
Early afternoon on July 14th, I arrived at Anchorage. After checking in the hotel room, it started to rain. I didn’t feel quite well because I had a complicated flight schedule. In between, I stopped at three different airports and caught a cold from a random passenger. I made myself a hot bath and ate a good meal for dinner. “Everything seems fine, and I only have a sore throat,†I comforted myself. In fact, that was a big lie; I knew this cold was going to cost me. (Lesson learned: Take good care of yourself all the time. Keep in good health before a demanding trip.)
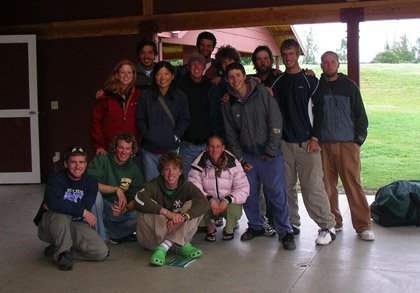
The rain never stopped, as the sunlight never really went away. The next morning, a school bus took us 11 students to Palmer, AK where NOLS Alaska branch is located. The instructors, Ben, Nate and Shawn welcomed us in suits. We soon started our orientation, and we exchanged our expectations for instructors, classmates and the expedition itself.
Gear Check and Preparation
The instructors checked with us to make sure we had brought proper personal gear or whether we needed to rent some. For this course, we were not allowed to bring any down items, such as down booties and sleeping bags. Given the terrain and weather, even if we tried our best to waterproof those items they would get wet eventually, and down loses its insulation power when it’s wet.
I had to rent a backpack and a pair of plastic boots. The backpack was huge, 110 liters in volume. To fit the backpack, they first asked me to tighten the hip belt at the proper location, and they stood in back of me and pulled the backpack very hard downwards. I should feel most of the weight on my hips and not on my shoulders. However, there was one thing both the gear-issuing person and I ignored: I pulled the hip belt almost all the way to the end. Doing this kind of trip, you lose weight and your waist line shrinks. You need a buffer on the hip belt. (Lesson learned: The length of a hip belt should be sufficient when you put on all your layers, and it should still be tighten-able when you lose weight.)
To fit the plastic boots, they emphasized that feeling a little loose is good. That way, the possibility of having blisters is minimized and the shins do not feel too much pressure. Shawn did a demo to show how loose the boots should be. She put her boots and gaiters on, and without undoing the shoelaces, she could pull the boots off her feet. For more information regarding fitting your boots, please read Beginner Backpack Workshop – Boots.
We used a piece of webbing and tied a water knot around the back panel of our backpack to reinforce the pack loop. When we travel on a snow-covered glacier, if somebody falls into a crevasse, it is much easier for him to climb up if he unbuckles his backpack. The only place the backpack attaches to the rope is the pack loop, which might not be strong enough given the weight we carry, and that is why we reinforce it with a piece of webbing.
We also cut two insoles out of an insulating foam pad. Therefore when we arrive at camp, we can pull out the inner boots of our plastic boots and give them a chance to dry. We then put the insoles and synthetic booties in the plastic shells to serve as camp shoes. We also insulated our bowls with the foam and duct tape, so that the food would not get cold too quickly on snow camps.
For socks, we each prepared five pairs. When we traveled, we usually wore two pairs and we kept one pair of dry socks inside the sleeping bag so that our feet would be dry at least for eight hours everyday. Furthermore, we used heavy-duty trash bags to waterproof the sleeping bag stuff sack and the clothes bag.
Here is a list of the personal gear I carried:
Footwear: Plastic boots, 5 pairs of socks, fleece insulated booties, gaiters, crampons, snowshoes.
Upperbody: Sports bra, Long-sleeve base layer, fleece vest, softshell jacket, synthetic insulated jacket, rain jacket.
Lowerbody: Four underwear, base layer pants, softshell pants, rain pants.
Head and Hands: Baseball hat, windstopper hat, balaclava, polypropylene glove liners, fleece gloves, Gore-tex gloves, primaloft mittens, mitten shells.
Sleeping gear: Sleeping bag, closed-cell sleeping pad, self-inflating sleeping pad, compression stuff sack (for sleeping bag).
Misc: Backpack, two bandannas, sunglasses, goggles, bowl, spork, chopsticks, two one-liter water bottles, lip balm, sunscreen, notebook and pencils, toothbrush, toothpaste, comb, tampons, hand sanitizer, watch, lighters, camera, headlamp, extra batteries, multi-tool, transceiver.
Climbing Gear: Harness, ice axe, two cordalettes (6-foot, and 12-foot), two non-locking carabiners, two locking carabiners, webbing for chest harness.
Group Gear:
Climbing ice axes, helmets, climbing ropes, climbing hardware (pickets, ice screws etc), tents, fuel, stoves, cooking gear, water treatment, snow shovels, avalanche probe, snow saw, repair kit, foot kit, maps, compass, radio, satellite phone, first aid kits.
Pack Packing
NOLS instructors use ABC to teach pack packing: Accessibility, Balance, and Compactness. Accessibility suggests people to keep frequently used items on top or in the side pockets, for example, sunscreen, water bottles, snacks, extra warm layers, rain gear etc. Balance requires people to wisely distribute the weight inside the backpack. It is advised to pack heavy items in the middle and close into the body, so that the stronger and larger muscle groups are those which support the heavy, dense load. Compactness advises people to reduce the space between items so that when we hike, we don’t feel stuff moving in the pack. Tips for accomplishing this include using small items to fill up the space and taking advantage of the compression straps of your pack. A well packed backpack should be able to stand on its own.
For example, this is typically how I pack my backpack during this trip:
I start with folding the deflated sleeping pad and setting it at the back of the backpack while putting the sleeping bag to the bottom. Then I stuff the rain fly of the tent into the backpack, filling up the space at the bottom of the backpack left by the sleeping bag. After that, I squeeze in a fuel bottle and then the entire food bag. The fuel bottle is below all the food in case it leaks. Before I place the food bag in the backpack, I put some food in my bowl and some food in the frying pan to minimize space waste. I put my bag of clothes on top of the food bag, and then fill up small space with the insulated insoles, rain gear and other small items. Finally I put crampons and harness with carabiners and cordalettes on top. In the brain of the backpack, I have the foot kit, snacks, and a hat. Outside the backpack, I strap a pair of snowshoes, a closed-cell sleeping pad and my ice axe. I tie two bandannas on the side compression straps, and one water bottle in each side packet.
Putting on a backpack
Our backpacks are heavy so it is extremely important to put it on correctly so that we do not hurt ourselves. Before leaving for the glacier, I had a chance to weight my pack, and it was 65 lbs. If I had not followed the procedures, I would never be able to put my pack on. Even though I followed the steps, putting on the backpack was still a major workout; many times I had to ask my teammates to help me.
Here are the steps to put on a backpack:
1. Place the backpack flat on the ground, the front of the pack facing down.
2. Bend one knee (say right knee) as if you are doing a lunge with that leg, and place the other leg properly so that it will support the weight and maintain your balance.
3. Drag the backpack towards you and pull up the lower half or one-third of the backpack on top of your right upper leg.
4. Grab the pack loop with your left hand and the shoulder strap (the one on your left) with your right hand. Draw the backpack in with both hands so that the backpack stands on your right upper leg.
5. Pass your right arm through the shoulder strap and settle the weight on your right shoulder and let go of the pack loop.
6. Put your left arm through the other shoulder strap. Stand up and tighten the hip belt and adjust all the straps.
Reverse the steps to put the backpack down.
Rations
We prepared all the food for the entire 28-day expedition before we left, and packed away four days of food with us. In total we had 3 re-rations: a 6-day re-ration, a 13-day and a 5-day re-ration.
We bagged the food into mostly 1-pound bags. The food which we had fell into these categories: breakfast, snacks, dinner, drink, and spices. I remembered I was shocked when I had to make 40 bags of cocoa (34 1-pound bags, and 6 half-pound ones). However, I was even more shocked when I heard that we had over 800 pounds of food in total. In average, a person consumes 2 to 2.5 pounds of food every day.
七月å四日,下åˆç´„莫兩三點,我抵é”Anchorage。在旅館櫃臺辦好相關手續之後,陰沈的天空也ç‰ä¸ä½ï¼Œé–‹å§‹ä¸‹èµ·æ¿›æ¿›ç´°é›¨ã€‚我感覺身體有些ä¸é©ï¼Œå¤§æ¦‚æ˜¯å› ç‚ºé€™è¶Ÿæ—…é€”åœç•™çš„é£›æ©Ÿå ´å¤ªå¤šï¼Œä¸çŸ¥é“何時何處從哪一個陌生人處,惹上了感冒病毒。洗了個熱水澡,åƒäº†é “è±ç››çš„晚é¤ï¼Œæˆ‘安慰自己說:「好åƒæ²’這麼嚴é‡å˜›ï¼åªæ˜¯è¼•å¾®çš„喉嚨痛罷了。ã€å”‰ï¼Œè‡ªå·±éƒ½çŸ¥é“這是個天大的謊言,心知肚明這å°æ„Ÿå†’會給我帶來大麻煩。(教訓:無時無刻都è¦å¥½å¥½ç…§é¡§è‡ªå·±ï¼Œä¿æŒèº«é«”的最佳狀態,尤其在é‚進漫長且艱辛的旅途之å‰ã€‚)
雨連綿地下著,沒有åœéŽï¼Œå¥½æ¯”陽光從來沒有é去。隔天清早,NOLS用å°äº®é»ƒè‰²çš„school bus,將我們一行11ä½å¸å“¡ï¼ŒæŽ¥åˆ°ä½æ–¼Palmer, AKçš„NOLSé˜¿æ‹‰æ–¯åŠ åˆ†éƒ¨ã€‚ä¸‰ä½æŒ‡å°Žå“¡ï¼ŒBenã€Nateå’ŒShawn襯衫西è£ç†æŒºåœ°è¿ŽæŽ¥æˆ‘們,很快地,新生訓練展開,個人抒發自我å°æŒ‡å°Žå“¡ã€å…¶ä»–å¸å“¡ã€ä»¥åŠèª²ç¨‹æœ¬èº«çš„期望,還有å°è‡ªå·±çš„期許。
è£å‚™æº–å‚™åŠæª¢æŸ¥
指導員一個接一個地,與å¸å“¡è¨Žè«–個人所攜帶的è£å‚™ï¼Œæ˜¯å¦æ°ç•¶ï¼Œéœ€ä¸éœ€è¦ç§Ÿç”¨é¡å¤–çš„è£å‚™ã€‚這個課程,ä¸å…許å¸å“¡æ”œå¸¶ä»»ä½•ç¾½æ¯›è£½å“,åƒæ˜¯ç¾½æ¯›ç¡è¢‹ã€ç‡Ÿåœ°éž‹ç‰ç‰ã€‚å› ç‚ºæ‰€è¦è¡Œèµ°çš„è·¯ç·šï¼ŒåŠ ä¸Šæ‰€è¦é¢å°çš„氣候,就算我們很努力地åšå¥½é˜²æ°´æŽªæ–½ï¼Œå®ƒå€‘終究還是會å—潮變濕的,而羽毛製å“一濕了就失去了ä¿æš–功能。
我需è¦ç§Ÿç”¨å¤§èƒŒå’Œä¸€é›™plastic boots。該backpack的容é‡è¶…大,有110å‡ã€‚試背的時候,他們è¦æ±‚我繫緊腰帶,然後站在我身後,用力將大背往下拉,確定我大部分是下åŠèº«å—力而ä¸æ˜¯è‚©è†€å—力。ä¸éŽç•¶æ™‚我和è£å‚™äººå“¡éƒ½å¿½ç•¥äº†ä¸€ä»¶äº‹ï¼Œæˆ‘的腰帶幾乎拉到底了,在這類的登山活動ä¸ï¼Œé«”力消耗極大,大部分的人都會掉好幾公斤,腰線也會變得苗æ¢ï¼Œéœ€è¦åœ¨è…°å¸¶ä¸Šé 留空間。(教訓:腰帶長度的範åœï¼Œéœ€å¾—在將所攜帶的衣物都穿上,或是瘦了好幾公斤的情æ³ä¸‹ï¼Œéƒ½è¦èƒ½å¤ 繫緊æ‰è¡Œã€‚)
試穿plastic boots的時候,指導員特別強調,行走的時候需è¦æœ‰äº›è¨±é¬†é¬†ï¼ˆloose)的感覺。如æ¤å¯æŠŠæ°´æ³¡ç”¢ç”Ÿçš„機率é™åˆ°æœ€ä½Žï¼ŒåŒæ™‚鞋帶ä¸è¦ç¶å¤ªç·Šï¼Œä»¥å…行走間給予å°è…¿è„›éª¨å¤ªå¤§çš„壓力。Shawn示範鞋å應該鬆弛的程度,她將鞋å穿上ã€ç¶è…¿ç¶å¥½ï¼ŒæŠ¬èµ·è…³ä¸€æ‹‰ï¼Œéž‹å連ç¶è…¿éƒ½å¸ä¸‹äº†ã€‚更多試穿登山鞋的資訊,請åƒç…§ï¼šã€ŒBackpacking 入門講座 – 登山鞋篇ã€
我們使用ç¶å¸¶ï¼ˆwebbing)來強化背包的æ帶(pack loop)。在冰河行走的時候,如果掉進冰河上的裂縫(crevasse),å¸ä¸‹èƒŒåŒ…,æ‰æ›´å®¹æ˜“爬出,而背包與行走時所用繩索連接的部分,就åªåœ¨pack loop的地方,所以我們使用一æ¢webbing在背包後é¢æ‰“上一個water knot來強化之。
接下來使用隔熱墊(insulating foam pad)沿著腳型剪下兩塊鞋底(insoles),如æ¤åœ¨ç‡Ÿåœ°çš„時候,å¯ä»¥å°‡plastic bootsä¸å…§å±¤çš„inner boots拉出,讓其有機會呼å¸ä»¥åŠä¹¾ç‡¥ã€‚將該兩塊隔熱鞋底置入plastic bootsçš„å¡‘è† å¤–æ®¼ï¼Œå¯ä¾›åšç‡Ÿåœ°éž‹ï¼ˆcamp shoes)使用。我們åŒæ™‚也用該隔熱墊é…åˆå¤§åŠ›è† 帶(duct tape),為食用時所用的碗,åšå¥½éš”熱措施,如æ¤åœ¨é›ªåœ°çš„時候,食物æ‰ä¸æœƒå†·å»å¤ªå¿«ã€‚
æ¯å€‹äººç´„莫å„帶了五雙襪å,行走的時候,通常穿著兩雙,兩雙備用,一雙總是置放在ç¡è¢‹ä¹‹ä¸ï¼Œç¡è¦ºçš„時候æ›ä¸Šï¼Œå¦‚æ¤ï¼Œè‡³å°‘æ¯å¤©æœ‰å…«å°æ™‚雙腳是乾燥的。å¦å¤–,我們使用垃圾袋特別為放置ç¡è¢‹ä»¥åŠè¡£ç‰©çš„袋å,åšäº†é˜²æ°´æº–備。
以下是我攜帶的個人è£å‚™ï¼ˆç”±æ–¼æœ‰äº›è£å‚™ä¸çŸ¥å°æ‡‰çš„ä¸æ–‡è©žå½™ï¼Œä»¥ä¸‹è£å‚™åˆ—表全以英文表示):
Footwear: Plastic boots, 5 pairs of socks, fleece insulated booties, gaiters, crampons, snowshoes.
Upperbody: Sports bra, Long-sleeve base layer, fleece vest, softshell jacket, synthetic insulated jacket, rain jacket.
Lowerbody: Four underwear, base layer pants, softshell pants, rain pants.
Head and Hands: Baseball hat, windstopper hat, balaclava, polypropylene glove liners, fleece gloves, Gore-tex gloves, primaloft mittens, mitten shells.
Sleeping gear: Sleeping bag, closed-cell sleeping pad, self-inflating sleeping pad, compression stuff sack (for sleeping bag).
Misc: Backpack, two bandannas, sunglasses, goggles, bowl, spork, chopsticks, two one-liter water bottles, lip balm, sunscreen, notebook and pencils, toothbrush, toothpaste, comb, tampons, hand sanitizer, watch, lighters, camera, headlamp, extra batteries, multi-tool, transceiver.
Climbing Gear: Harness, ice axe, two cordalettes (6-foot, and 12-foot), two non-locking carabiners, two locking carabiners, webbing for chest harness.
Group Gear:
Climbing ice axes, helmets, climbing ropes, climbing hardware (pickets, ice screws etc), tents, fuel, stoves, cooking gear, water treatment, snow shovels, avalanche probe, snow saw, repair kit, foot kit, maps, compass, radio, satellite phone, first aid kits.
背包打包
NOLS以ABC原則來指導å¸å“¡æ‰“包:Accessibility(易å–)ã€Balance(平衡)以åŠCompactness(緊密)。易å–原則建è°æ‰“包者,將常用的物å“置放在背包上部,或是å´é‚Šå£è¢‹ï¼Œè¦ä½¿ç”¨çš„時候,æ‰ä¸æœƒæ‰‹å¿™è…³äº‚,å¯ä»¥è¼•æ˜“å–出。這些物å“åƒæ˜¯ä¿æš–衣物ã€é˜²æ›¬æ²¹ã€æ°´å£ºã€é›¨å…·ç‰ç‰ã€‚平衡原則æ醒打包者,注æ„背包ä¸é‡é‡çš„分é…,ä¸è¦ä¸€é‚Šè¼•ä¸€é‚Šé‡ã€‚å¦å¤–較é‡çš„物å“應該置放在ä¸å¤®ä¸”é 近身體處,讓身體有力的大肌肉群,為主è¦æ”¯æ’該些é‡é‡çš„地方。緊密原則則希望打包者,減少空間浪費,行走時ä¸æœƒæ„Ÿè¦ºèƒŒåŒ…ä¸çš„æ±è¥¿ç§»ä¾†ç§»åŽ»ã€‚è¦åšåˆ°é€™åŽŸå‰‡ï¼Œå¯ä»¥åˆ©ç”¨å°ç‰©ä»¶å°‡é›¶ç¢Žçš„空間填滿,åŒæ™‚需好好利用背包的compression strapsã€‚æ‰“åŒ…å®Œç¾Žçš„èƒŒåŒ…éœ€èƒ½å¤ è‡ªè¡Œç«™ç«‹ã€‚
舉例來說,以下是我æ¯å¤©ä¾‹è¡Œçš„打包公事:
首先我將我的充氣ç¡å¢Šæ¶ˆæ°£ä¹‹å¾Œï¼Œä¸‰æŠ˜è²¼ç·ŠèƒŒåŒ…背部置入,åŒæ™‚å°‡ç¡è¢‹å£“進背包底部。之後塞入帳棚的雨布,塞入雨布時使用其填滿背包底部ã€æ²’有被ç¡è¢‹ä½”用的空間。之後,放進一ç½ç‡ƒæ–™ï¼Œå†ç½®æ”¾é£Ÿç‰©è¢‹ã€‚燃料需在所有的食物下方,以防è¬ä¸€è¡Œèµ°æ™‚燃料外洩。置放食物袋之å‰ï¼Œéœ€å¾—先整ç†é£Ÿç‰©è¢‹ï¼Œæ¯”如說將一些食物放進碗ä¸ï¼Œå¦ä¸€äº›æ”¾é€²é‹å…·ä¸ï¼Œä»¥æ¸›å°‘空間的浪費。接著將衣物袋放在食物袋的上方,用一些體ç©å°æˆ–是柔軟的æ±è¥¿ï¼Œåƒæ˜¯éš”熱鞋墊ã€é›¨è¤²ç‰ï¼Œå¡«é€²ä¸€äº›é›¶ç¢Žçš„ç©ºé–“ã€‚æœ€å¾Œåœ¨é ‚ç«¯ç½®æ”¾è¡Œé€²æ™‚å¯èƒ½æœƒä½¿ç”¨çš„æ±è¥¿ï¼Œåƒæ˜¯å†°çˆªã€æ”€ç™»ç”¨å…·ã€ä¿æš–衣物ã€é›¨è¡£ç‰ã€‚èƒŒåŒ…çš„é ‚è¢‹ä¸ï¼Œæˆ‘放入行進糧ã€å¸½åã€ä»¥åŠç‚ºé˜²æ¢æ°´æ³¡ç”¢ç”Ÿçš„è† å¸ƒç‰ã€‚背包外則打上雪鞋(snowshoes)ã€å†°æ–§ã€closed-cellç¡å¢Šï¼Œç¶ä¸Šå…©æ¢å››æ–¹å·¾ï¼Œåœ¨å´é‚Šå£è¢‹ä¸ç½®æ”¾æ°´å£ºã€‚
背上大背
å› ç‚ºèƒŒåŒ…æœ‰ç›¸ç•¶çš„é‡é‡ï¼Œä¾ç…§æ¨™æº–æ¥é©ŸèƒŒä¸ŠèƒŒåŒ…,也變æˆç›¸ç•¶é‡è¦çš„一件事,使用這些æ¥é©Ÿï¼Œå¯ä»¥é 防背背包時å¯èƒ½ç™¼ç”Ÿçš„肌肉傷害。在離開之å‰ï¼Œæˆ‘æœ‰æ©Ÿæœƒç§¤ä¸€ç§¤æˆ‘èƒŒè² çš„é‡é‡ï¼Œå¤§ç´„是65英磅,如果我ä¸ä¾ç…§è©²äº›æ¥é©Ÿï¼Œæˆ‘是沒有辦法將背包放到背上的。ä¸éŽï¼Œå°±ç®—我按部就ç,將背包放到背上也是挺累人的,有時候我還是è¦æ±‚åŒä¼´åŠ©æˆ‘一臂之力。
以下是置放背包的æ¥é©Ÿï¼š
1. 讓背包躺平,æ£é¢æœä¸‹ã€‚
2. 一腿屈è†è·¨å¤§å¼“ç®æ¥ï¼ˆå‡è¨æ˜¯å³è…¿ä»¥æ–¹ä¾¿ä»¥ä¸‹èªªæ˜Žï¼‰ï¼Œå¦ä¸€è…¿ç½®æ”¾çš„地方需得支æ’é‡é‡ï¼Œå¹«åŠ©èº«åç¶æŒå¹³è¡¡ã€‚
3. 雙手將背包拉近,將著將背包下部約三分之一到二分之一的體ç©ï¼Œæ‹‰åˆ°å³å¤§è…¿ä¸Šã€‚
4. 左手æ¡ä½pack loop,å³æ‰‹æ‹‰ä½é¢å°èƒŒåŒ…左邊的肩帶,雙手使力,讓背包垂直站在å³å¤§è…¿ä¸Šã€‚
5. å°‡å³æ‰‹è‡‚ç©¿éŽè‚©å¸¶ï¼Œä»¥å³è‚©æ‰¿å—背包的é‡é‡ï¼Œæ”¾é–‹å·¦æ‰‹ã€‚
6. 將左手臂穿éŽå¦ä¸€è‚©å¸¶ï¼Œç«™èµ·ï¼Œç¹«ç·Šè…°å¸¶ï¼Œä¸¦èª¿æ•´èƒŒåŒ…。
放下大背時則ä¾ç…§ç›¸åé †åºã€‚
食物åŠè£œçµ¦
在出發之å‰ï¼Œæˆ‘å€‘å¿…é ˆå°‡å…¨éƒ¨28天所è¦é£Ÿç”¨çš„物å“全部打點好,åŒæ™‚並帶走四天的食物。之後,我們總共有三次補給,å„é€é€²å…天ã€å三天以åŠäº”天的食物。
我們將食物秤é‡åˆ†è£é€²å¡‘è† è¢‹ä¸ï¼Œå¤§éƒ¨åˆ†éƒ½æ˜¯ä¸€ç£…é‡çš„分è£ï¼Œå°‘許是åŠç£…é‡çš„分è£ã€‚基本上食物分為以下大類:早é¤ã€è¡Œé€²ç³§ã€æ™šé¤ã€é£²å“ã€ä»¥åŠèª¿å‘³å“ã€‚æˆ‘è¨˜å¾—ç•¶æ™‚æˆ‘çœ‹åˆ°æˆ‘å¿…é ˆåˆ†è£37磅的å¯å¯çš„æ™‚å€™ï¼Œå¿ƒè£¡æ˜¯è »å—驚嚇的。ä¸éŽç•¶æˆ‘知é“我們總共有超éŽ800磅的食物時,那驚嚇就ä¸ç®—什麼了。平å‡ä¾†èªªï¼Œä¸€å€‹äººæ¯å¤©æ¶ˆè€—2到2.5磅é‡çš„食物。
çœ‹è‘—ä½ ä¸åœè‘—在野外打滾,我å»é›¢å±±æž—愈來愈é â€¦ä½ å¤ªå¹¸é‹äº†ï¼Œæœ‰é€™æ¨£çš„機緣享å—é€™éº¼æœ‰æ¨‚è¶£çš„ç”Ÿæ´»ï¼Œé‚Šçœ‹ä½ å¯«â€œèƒŒä¸Šå¤§èƒŒåŒ…â€œæ„Ÿè¦ºå°±åƒä¸€å€‹äººåœ¨é¢å‰è¡¨æ¼”如何輕巧æ¹ä¸Šå¤§åŒ…包一樣。我已好久沒被我的大包包æ“抱了,想著最後一次æ¹è‘—它是何時…是去å—湖大山çµæžœé‡é¢±é¢¨æ’¤é€€ï¼Œæ„ˆæƒ³æ„ˆä¸å¹²å¿ƒå•Š!
sniper,
好一陣åæ²’çœ‹åˆ°ä½ ç•™è¨€äº†ï¼Œä¸éŽæˆ‘éƒ½æœ‰åŽ»ä½ çš„ç›¸ç°¿åƒè§€å–”ï¼
ä¹Ÿå¸Œæœ›ä½ è¶•å¿«æœ‰æ©ŸæœƒåŽ»çˆ¬å±±å–”ï¼Œå¤šç…§ä¸€äº›é«˜å±±ç¾Žæ™¯ä¾†è®“æˆ‘æ‡·å¿µæ•…é„‰å§ï¼
背包打包的方å¼å¾ˆé‡è¦
尤其是騎單車時背著
沒有è£å¥½æ™ƒå¾—更明顯厲害
ç´¯æ»äººäº†
ä¸éŽç™»å±±å¥è¡Œçš„æ–¹å¼é‚„是嚴謹一點
沒錯,打包是相當é‡è¦çš„,
有時候差一點就會感覺很ä¸ä¸€æ¨£å‘¢ï¼Œ
所以除了基本原則以外,還è¦ç”¨è¦ªèº«é«”驗來åšå¾®èª¿ã€‚